Step-by-Step Journey: What to Expect with Clear Aligners
April 29, 2025
Introduction
Modern orthodontics has evolved tremendously, and clear aligners are at the forefront of this transformation. Whether you seek a straighter smile for aesthetic reasons or to improve your bite, clear aligners offer a discreet, comfortable, and effective solution. In this detailed guide, we walk you through the entire clear aligner journey — step-by-step — so you know exactly what to expect at every stage.
Choosing to align your teeth is a major commitment, and understanding the process empowers you to make informed decisions, stay on track, and achieve the smile you've always dreamed of.
What Are Clear Aligners?
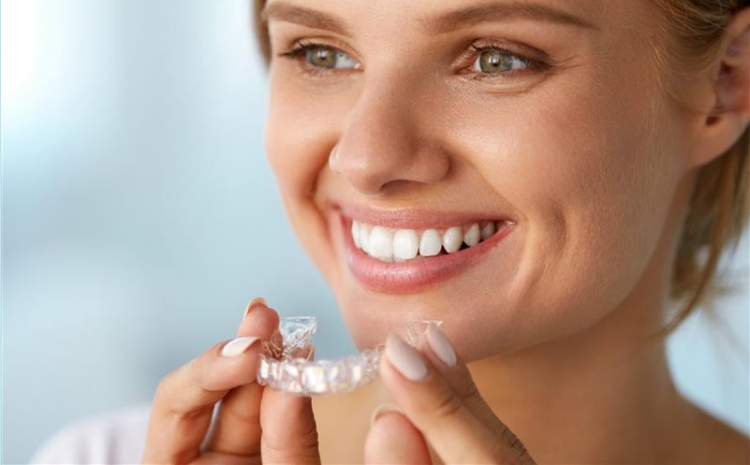
Clear aligners are custom-made, transparent trays designed to gradually shift your teeth into proper alignment. Unlike traditional braces, which use metal wires and brackets, clear aligners are nearly invisible, removable, and made of smooth plastic for maximum comfort.
Popular brands like Invisalign, ClearCorrect, and Spark have revolutionized orthodontic care, offering patients an alternative that fits seamlessly into modern lifestyles.
How Clear Aligners Work:- A series of aligner trays are created based on a digital scan or impression of your teeth.
- Each tray applies controlled forces to specific teeth, moving them slightly over time.
- Patients typically wear each set for 1-2 weeks before switching to the next set.
- The process continues until the desired tooth alignment is achieved.
Step 1: Initial Consultation
Your journey with clear aligners begins with an initial consultation with a licensed orthodontist or dentist experienced in clear aligner therapy.
What Happens During the Consultation?- Comprehensive oral examination
- Digital imaging (X-rays, intraoral scans)
- Assessment of eligibility (e.g., mild to moderate misalignments, spacing, or crowding)
- Discussion of treatment goals and expectations
Key Tip: Bring a list of questions to ask during your consultation to ensure you understand the process, costs, and responsibilities.
Step 2: Customized Treatment Plan
If you're a candidate for clear aligners, the next step is creating a personalized treatment plan.
What This Step Involves:- Detailed 3D digital scan or impression of your teeth.
- Simulation of how your teeth will move at each stage.
- Preview of your future smile.
- Estimated treatment duration and cost breakdown.
| Component | Description |
|---|---|
| Digital Scans | 3D images of teeth and jaw structure |
| Treatment Timeline | Expected months of treatment |
| Projected Outcome | Visualization of final results |
| Cost Estimation | Full breakdown of expenses |
This plan ensures that both you and your orthodontist are aligned (pun intended!) on the expected outcomes and timelines.
Step 3: Receiving Your Aligners
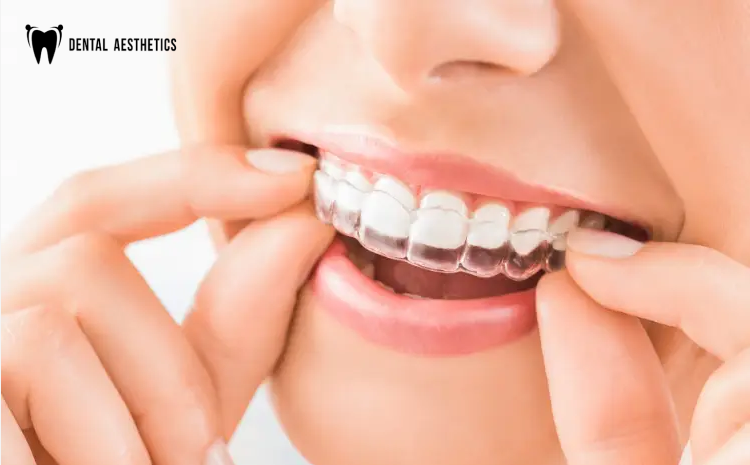
Once your aligners are ready, you will receive a set of trays, each designed for a specific stage of tooth movement.
Key Details:- Most patients receive multiple trays at once.
- Each tray is labeled and meant to be worn sequentially.
- Your orthodontist will explain how to insert, remove, and care for your aligners.
You may also receive a starter kit that includes a case for your aligners, cleaning crystals, and wear instructions.
Step 4: Wearing Your Aligners
Consistency is crucial. You must wear your aligners for 20 to 22 hours a day for effective results.
What to Expect:- Mild discomfort or pressure when starting a new tray (this is normal).
- Slight adjustments in speech initially.
- Guidelines to remove aligners while eating or drinking anything other than water.
| Do's | Don'ts |
|---|---|
| Wear aligners 20–22 hours daily | Eat with aligners on |
| Rinse after removing them | Drink hot beverages with aligners in |
| Brush after meals before reinserting | Forget to clean them daily |
Maintaining this routine ensures your treatment stays on schedule.
Step 5: Regular Check-ups
You'll have scheduled appointments, typically every 6 to 8 weeks, to monitor progress and receive your next sets of aligners.
Purpose of Check-ups:- Ensure teeth are moving as planned.
- Make necessary adjustments.
- Address any concerns or fit issues.
Regular check-ins keep your treatment on track and allow your provider to intervene if issues arise early.
Step 6: Switching to New Aligners
You'll switch to a new set of aligners every one to two weeks, depending on your orthodontist's instructions.
Key Tips:- Always switch to new aligners at night to let your teeth adjust while you sleep.
- Save your previous set just in case you lose or damage the new one.
Being diligent about switching trays on schedule ensures predictable results.
Step 7: Managing Discomfort
Some discomfort is normal, especially when transitioning to a new aligner set.
Common Experiences:- Soreness in teeth and gums
- Mild pressure
- Occasional irritation at tray edges
- Use over-the-counter pain relievers if necessary.
- Apply cold compresses.
- Request tray smoothing from your provider if sharp edges irritate your gums.
If pain is severe or persists beyond a few days, contact your orthodontist immediately.
Step 8: Maintaining Oral Hygiene
Excellent oral hygiene is non-negotiable during your clear aligner journey.
Essential Practices:- Brush after every meal and snack.
- Floss at least once a day.
- Clean aligners daily to prevent staining and odor.
| Method | Pros | Cons |
|---|---|---|
| Specialized Cleaning Tablets | Highly effective at killing bacteria | Slightly expensive |
| Gentle Toothbrush + Water | Cost-effective | May not remove all buildup |
| Soaking in Denture Cleaner | Easy to find | May leave a chemical taste |
Neglecting your oral hygiene can lead to cavities, gum disease, or aligner discoloration.
Step 9: Completing the Treatment
Reaching your final tray is a major milestone!
Final Steps:- Final check-up and dental exam.
- Retainer fitting (more on this below).
- Celebration of your new, beautiful smile!
Your orthodontist will ensure your teeth have moved to their intended positions before transitioning you to the retention phase.
Step 10: Retainers
Completing aligner treatment doesn't mean the journey is over. Retainers are crucial to maintaining your results.
Why Retainers Matter:- Teeth naturally try to shift back to their original positions.
- Retainers "lock in" your new smile.
- Clear Retainers: Look similar to aligners, worn at night.
- Fixed Retainers: Thin wire bonded behind the teeth.
- Wear as instructed (usually nightly).
- Clean retainers regularly.
- Replace them if damaged or loose.
Common Challenges with Clear Aligners
While clear aligners are generally straightforward, challenges can arise:
Common Issues:- Lost trays: Always keep the previous set as a backup.
- Non-compliance: Skipping hours can delay progress.
- Speech changes: Temporary lisp when first wearing aligners.
- Staining: Colored beverages like coffee or wine can stain trays.
Overcoming these minor hurdles ensures smoother, faster treatment.
Advantages of Clear Aligners Over Braces
Clear aligners offer numerous benefits compared to traditional braces.
Table 4: Clear Aligners vs Braces Comparison| Feature | Clear Aligners | Traditional Braces |
|---|---|---|
| Visibility | Nearly invisible | Highly noticeable |
| Comfort | Smooth, irritation-free | Sharp brackets and wires |
| Removability | Can eat/drink freely | Permanent until removed by orthodontist |
| Maintenance | Easy to clean | Brushing around brackets required |
| Office Visits | Fewer required | Frequent adjustments |
For many patients, these advantages make clear aligners the preferred orthodontic solution.
How Long Does Clear Aligner Treatment Take?
The total treatment time varies based on individual cases.
General Timeline:- Mild corrections: 6–8 months
- Moderate cases: 12–18 months
- Severe adjustments: 18–24+ months
Factors like compliance, age, and biological response affect the timeline.
How Much Do Clear Aligners Cost?
The cost of clear aligners depends on case complexity, provider expertise, and geographic location.
Average Costs:- Mild cases: $2,000 – $4,000
- Moderate to severe cases: $4,000 – $7,000
Tip: Many providers offer flexible financing plans and accept dental insurance that partially covers orthodontic treatments.
Tips for a Successful Clear Aligner Journey
- Stay disciplined: Wear aligners consistently.
- Stay clean: Maintain excellent oral hygiene.
- Stay informed: Follow your provider’s instructions carefully.
- Stay positive: Minor setbacks are normal; the results are worth it!
Consistency and patience will guarantee the smile you've been dreaming of.
Final Thoughts
Choosing clear aligners is a life-changing decision that brings you closer to the confident, healthy smile you deserve. As you journey through each step — from consultation to wearing your final retainer — understanding what to expect helps you stay motivated and committed to the process.
Clear aligners offer flexibility, comfort, and discretion, making them a popular choice among teens and adults alike. However, success with clear aligners is not automatic; it depends largely on your discipline in wearing them consistently, maintaining excellent oral hygiene, and following your orthodontist’s instructions.
By preparing yourself with the right information and mindset, you can navigate your clear aligner journey smoothly and achieve outstanding results. Remember, a beautiful smile is not just about aesthetics — it reflects your dedication to self-care and confidence in your personal and professional life.
Your perfect smile is just a few aligners away!Frequently Asked Questions (FAQs)
-
Are clear aligners painful?
You may experience mild discomfort, especially when switching trays, but it typically subsides within a few days.
-
Can clear aligners fix all dental issues?
Clear aligners are best suited for mild to moderate spacing, crowding, and bite issues. Severe cases may require traditional orthodontics.
-
How often should I wear my aligners each day?
You should wear your aligners for 20 to 22 hours per day, removing them only for eating, drinking, brushing, and flossing.
-
What happens if I lose an aligner tray?
Contact your orthodontist immediately. You may need to either move to the next set early or order a replacement.
-
Are clear aligners faster than braces?
For mild cases, clear aligners can sometimes deliver results faster, but treatment time depends on individual complexity.
-
Can teenagers use clear aligners?
Yes! Many clear aligner brands offer specialized options for teenagers, often with compliance indicators.
-
Do clear aligners affect speech?
You may experience a slight lisp initially, but most people adjust within a few days.
-
How do I clean my clear aligners properly?
Rinse them after every removal and clean daily with specialized cleaning solutions or mild soap and water.
-
Can I chew gum while wearing clear aligners?
No. Chewing gum can damage or stain your aligners. Always remove them before eating anything.
-
Is it okay to drink coffee with aligners on?
It’s best to remove aligners before drinking coffee, as it can stain or warp them.
Share:


Request An Appointment
Map
Timings
Monday - Saturday
11:00 am - 9:30pm
Sunday
12:00pm - 8:00pm